Embroidery Stitch Guide
-
![]()
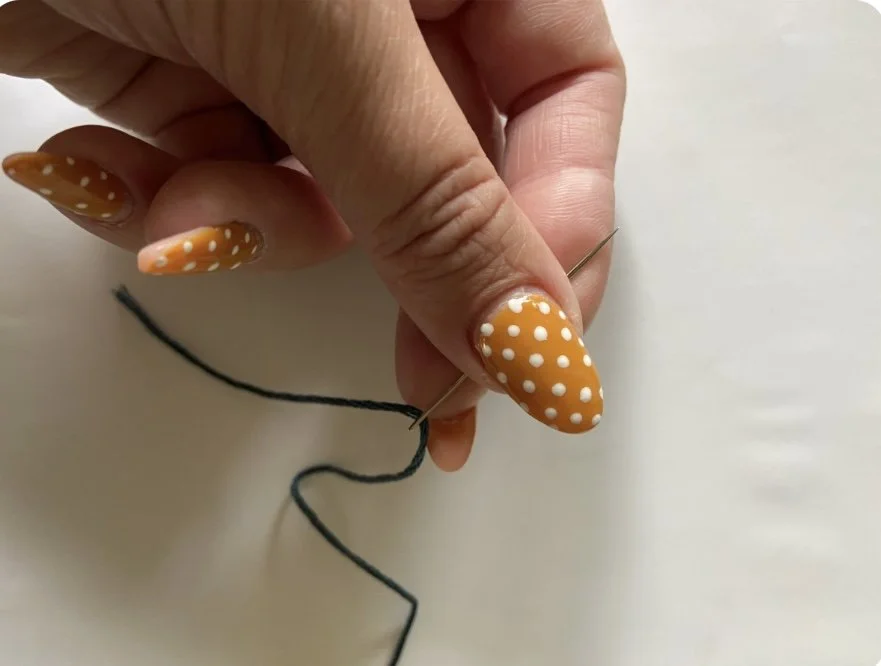
Threading Your Needle
The way you thread your needle for embroidery is different than you do for regular sewing. When embroidering, you leave one tail of the thread loose and tie a knot in only one end.
As you become more experienced with embroidery, you can learn more about how to use anchor stitches and waste knots instead of a big knot for the end of your thread. I have been sewing for my whole life, and I only sometimes use these. Feel free to search on the internet for more information if you want to keep the back of your embroidery a little cleaner. Personally, the knots don’t bother me at all!
Embroidery floss is made up of 6 strands wrapped together. Cut the length you want, hold the piece loosely and pull out one strand at a time.
Thread the needle with the number of strands of embroidery floss desired. More strands = thicker line.
If you are looking to add more detail, I suggest using less strands of floss. You are able to add more stitches and finer lines.
If you’re looking for thicker lines or you want a chunkier effect, use more strands. These stitches will be raised off the fabric more and create a more textured result!
Anne’s Tip: Always pull your embroidery thread from the end with the number on the label, not the one with the brand logo. And shorter lengths are much easier to separate!
-
![]()
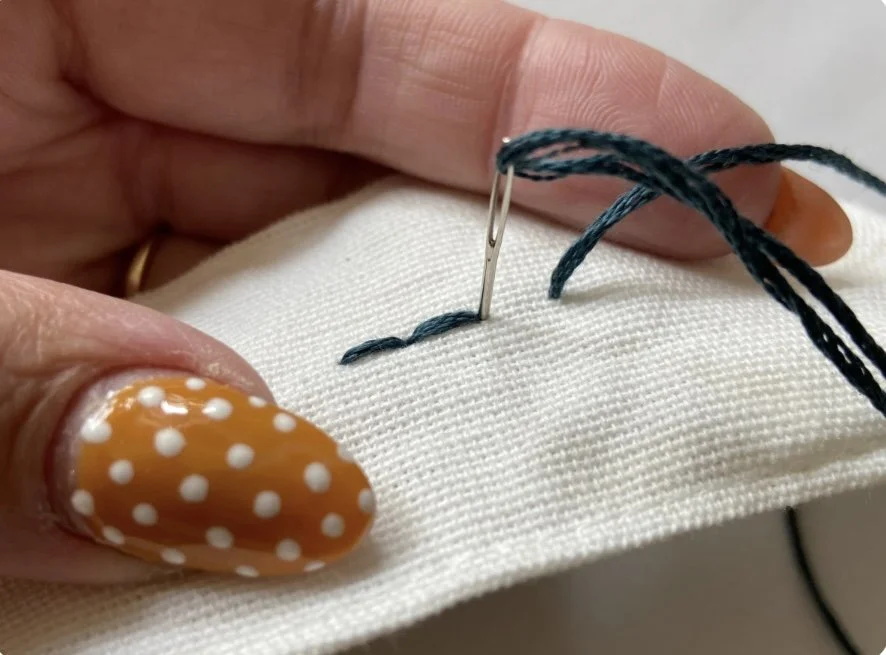
Straight Stitch
This is the most basic of stitches. It is a good place to start if you are a beginner.
Take the needle up through the back of the fabric, coming out the front. Then take the needle back down next to where you came up, whatever length you desire.
-
![]()
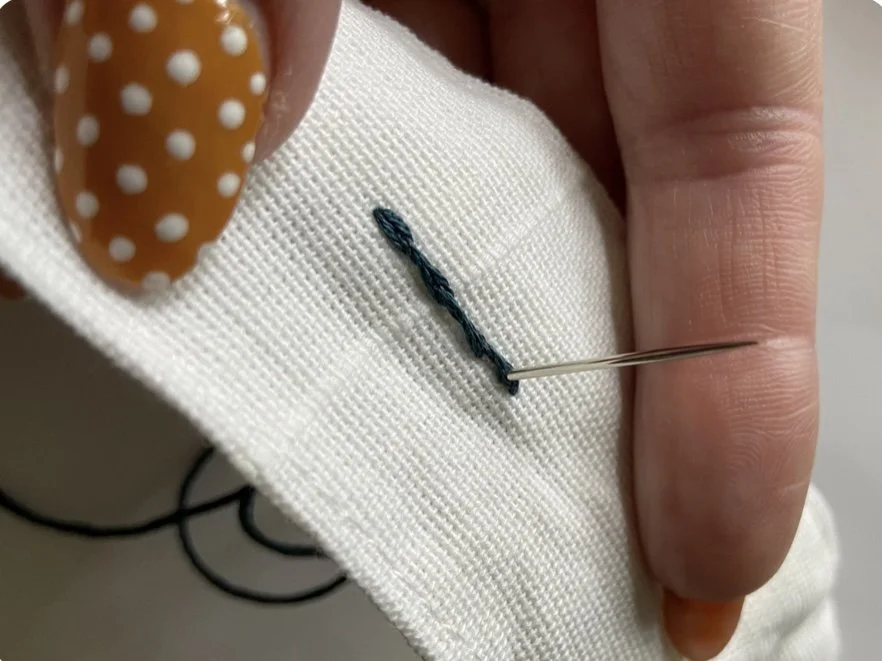
Back Stitch
This stitch is kind of an amped up straight stitch. It is nice for outlining as there are no gaps between the stitches.
To begin, come up through the back of the fabric one stitch length away from where you want your line to begin. Put your needle down through where you want to start the line, so your stitch is “drawn” backwards on your fabric. For your next stitch, pull your needle up through the fabric another stitch length away from your first. This time, when you go back down you will put your needle directly next to where your first stitch started and pull through.
-
![]()
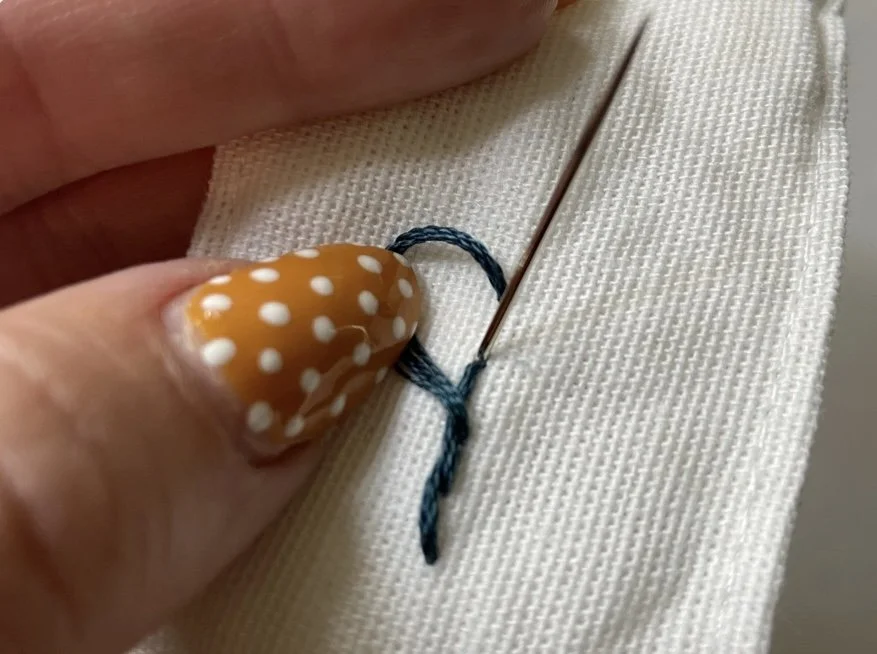
Split Stitch
Very similar to the back stitch, except instead of going next to the stitch before, you go through that stitch, splitting it. This creates a more seamless looking line, and it is my preferred stitch for outlining, especially if you are going to cover it up with satin stitch.
(This might be different from other embroidery artists, but it’s what works for me!)
-
![]()
Stem Stitch
This stitch is great for outlining, especially on curved lines. It also is more decorative than the last stitches if you want a fancier looking line. It looks great as flower and plant stems, thus the name!
To make this stitch, come up through your fabric from the back, and then go down a stitch lengths away. Pull your needle down, but do not pull the thread all the way through. Come back up at the halfway point of this stitch, without going through your loop of thread that’s still loose on top. Keep the loop on one side and the needle with your working thread on the other side (or top vs bottom). Once you are sure they are on the correct sides, you can pull the thread all the way. Next, you will take your needle and make another stitch, coming back up where your last stitch ended. The important part here is to keep your loop side and your thread side consistent, so it will form a consecutive twist appearance as you go.
Anne’s Tip: If you are doing a stem stitch on a curve, keep your loop on the outside of the curve and your working thread on the inside. This way the twist will follow the curve.
-
![]()
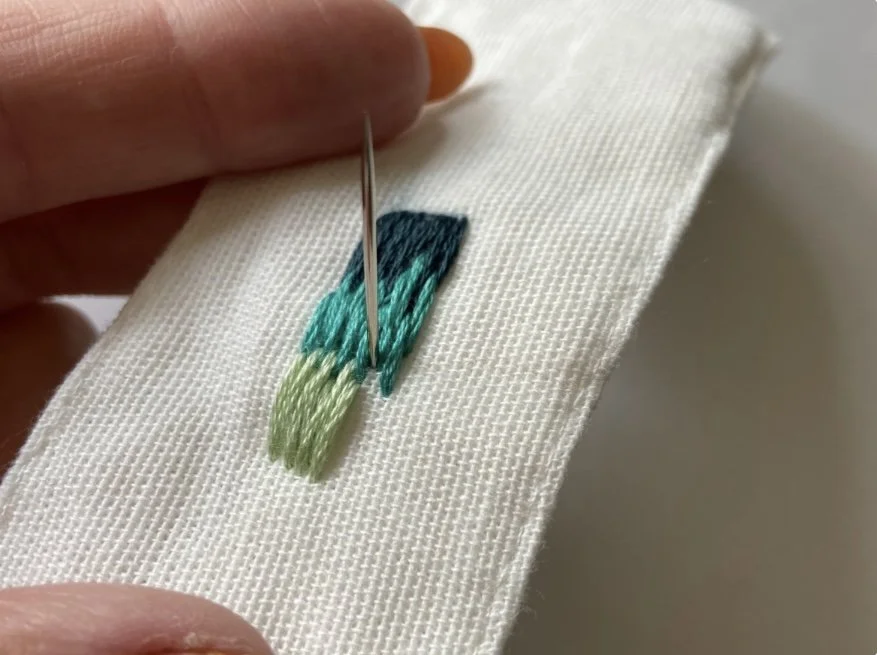
Satin Stitch
This is the classic stitch used to fill in areas while embroidering. I think it makes it a lot cleaner and better looking if you first outline the area you are going to fill with one of the previous stitches. Nine times out of ten I use the split stitch first, then cover it up with satin stitch.)
Start your first stitch on one side of your outline, and take the stitch all of the way across to the other side, opposite of where you started. Come up again through the back of the fabric, directly next to your first stitch and then all the way across to the other side. Repeat this process until the whole area is filled.
Anne’s Tip: The key is to keep your stitches parallel to each other, so they lie nice and flat and create a satin appearance.
-
![]()
Long and Short Stitch
This is a variation of the satin stitch. It is useful for creating gradients within an outline, and also for when the area you are filling is larger and regular satin stitch would not work.
You start by creating a row of satin stitch, but alternating the length of each stitch (long and then short.) For your second row, you will be doing the same alternations, only opposite from the first row.
Anne’s Tip: To make this stitch look more natural, especially when doing a gradient, once you have the hang of it, try alternating your stitches between various lengths, not simply short then long, short then long.
-
![]()
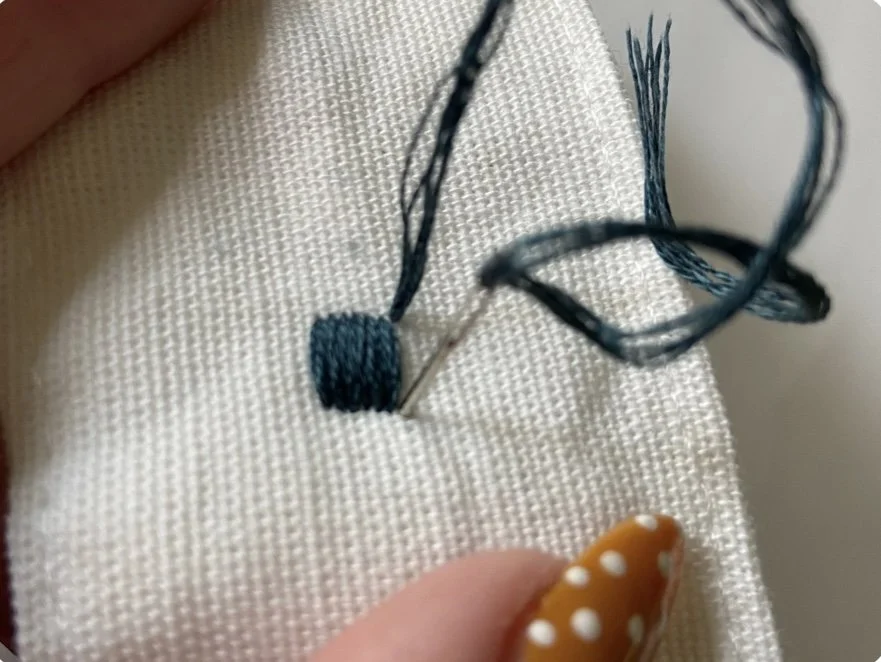
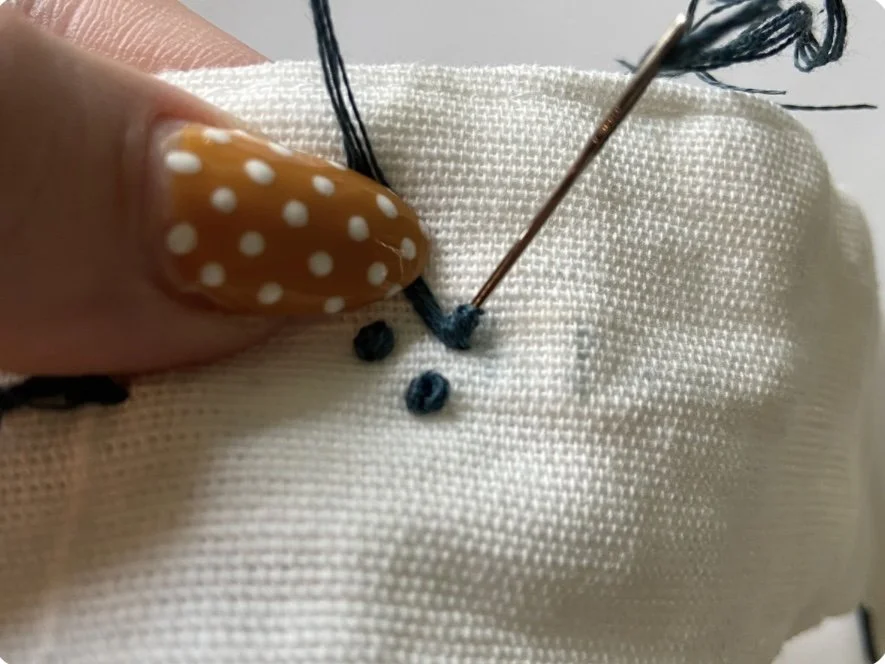
French Knot
I think of this as the fancy stitch. It adds great texture and a little pizazz to otherwise flat patterns. I like it for things like the buds on Queen Anne’s Lace or as a pretty way to do tree leaves.
Take your thread up through the back of the fabric and the wrap the thread once around the needle and keep it there. Next, take your needle and put it back down through the fabric directly next to where it came up. Pull the thread taut with your other hand while pulling the needle all the way through. Your thread length should pull through your knot and you will be left with a pretty little knot on the top of your fabric.
One wrap will result in a smaller knot, two wraps will be slightly larger.
Anne’s Tip: This one takes a little work, so I’d suggest practicing on a separate piece of fabric until you feel like you’ve got the hang of it.